📘 Note
You must be an Aptible organization owner to enable SCIM for your organization.
Step 1: Create a SCIM Integration in Aptible
- Log in to Aptible: Sign in to your Aptible account with OrganizationOwner privileges.
- Navigate to Provisioning: Go to the ‘Settings’ section in your Aptible dashboard and select Provisioning.
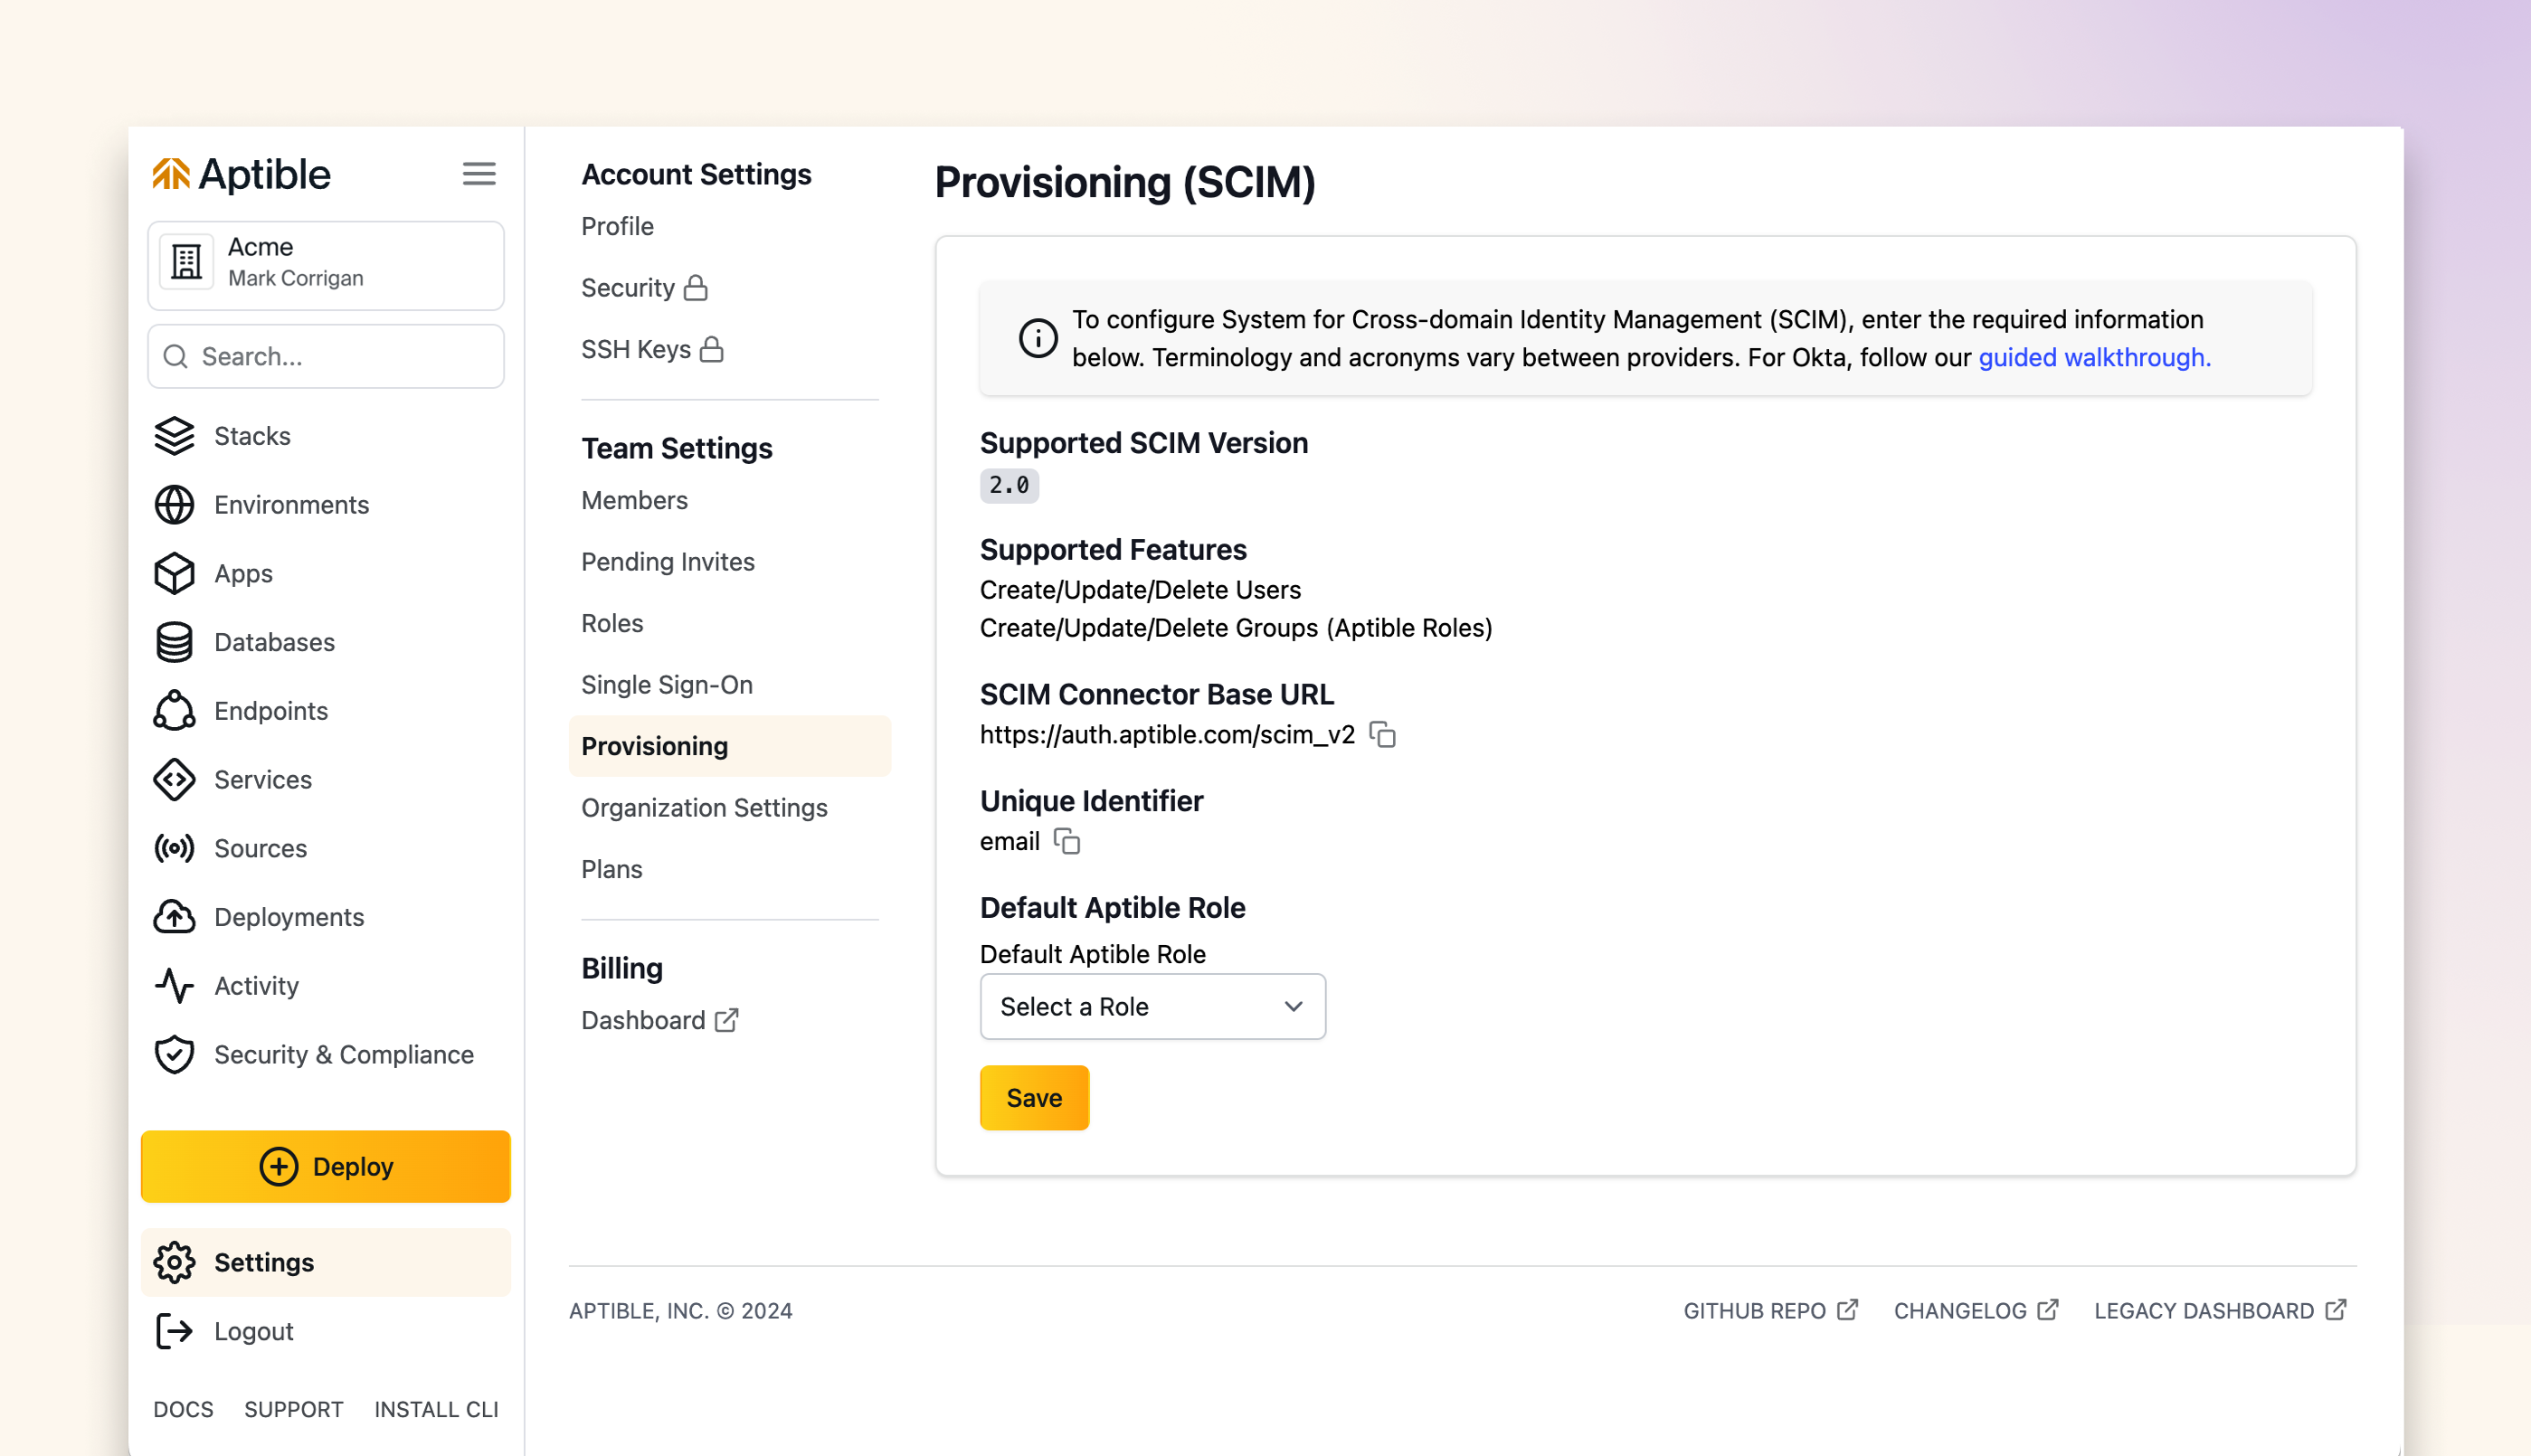
- Define Default Role: Update the Default Aptible Role. New users created by SCIM will be automatically assigned to this role.
- Generate SCIM Token: Aptible will provide a SCIM token, which you will need for Entra Identity configuration. Save this token securely; it will only be displayed once.
📘 Note
Please note that the SCIM token has a validity of one year.
- Save the Changes: Save the configuration.
Step 2: Enable SCIM in Entra Identity
Entra Identity supports SCIM 2.0, allowing you to enable user provisioning directly through the Entra Identity portal.- Access the Entra Identity Portal: Log in to your Entra Identity admin center.
- Go to Enterprise Applications: Navigate to Enterprise applications > All applications.
- Add an Application: Click on ‘New application’, then select ‘Non-gallery application’. Enter a name for your custom application (i.e., “Aptible”) and add it.
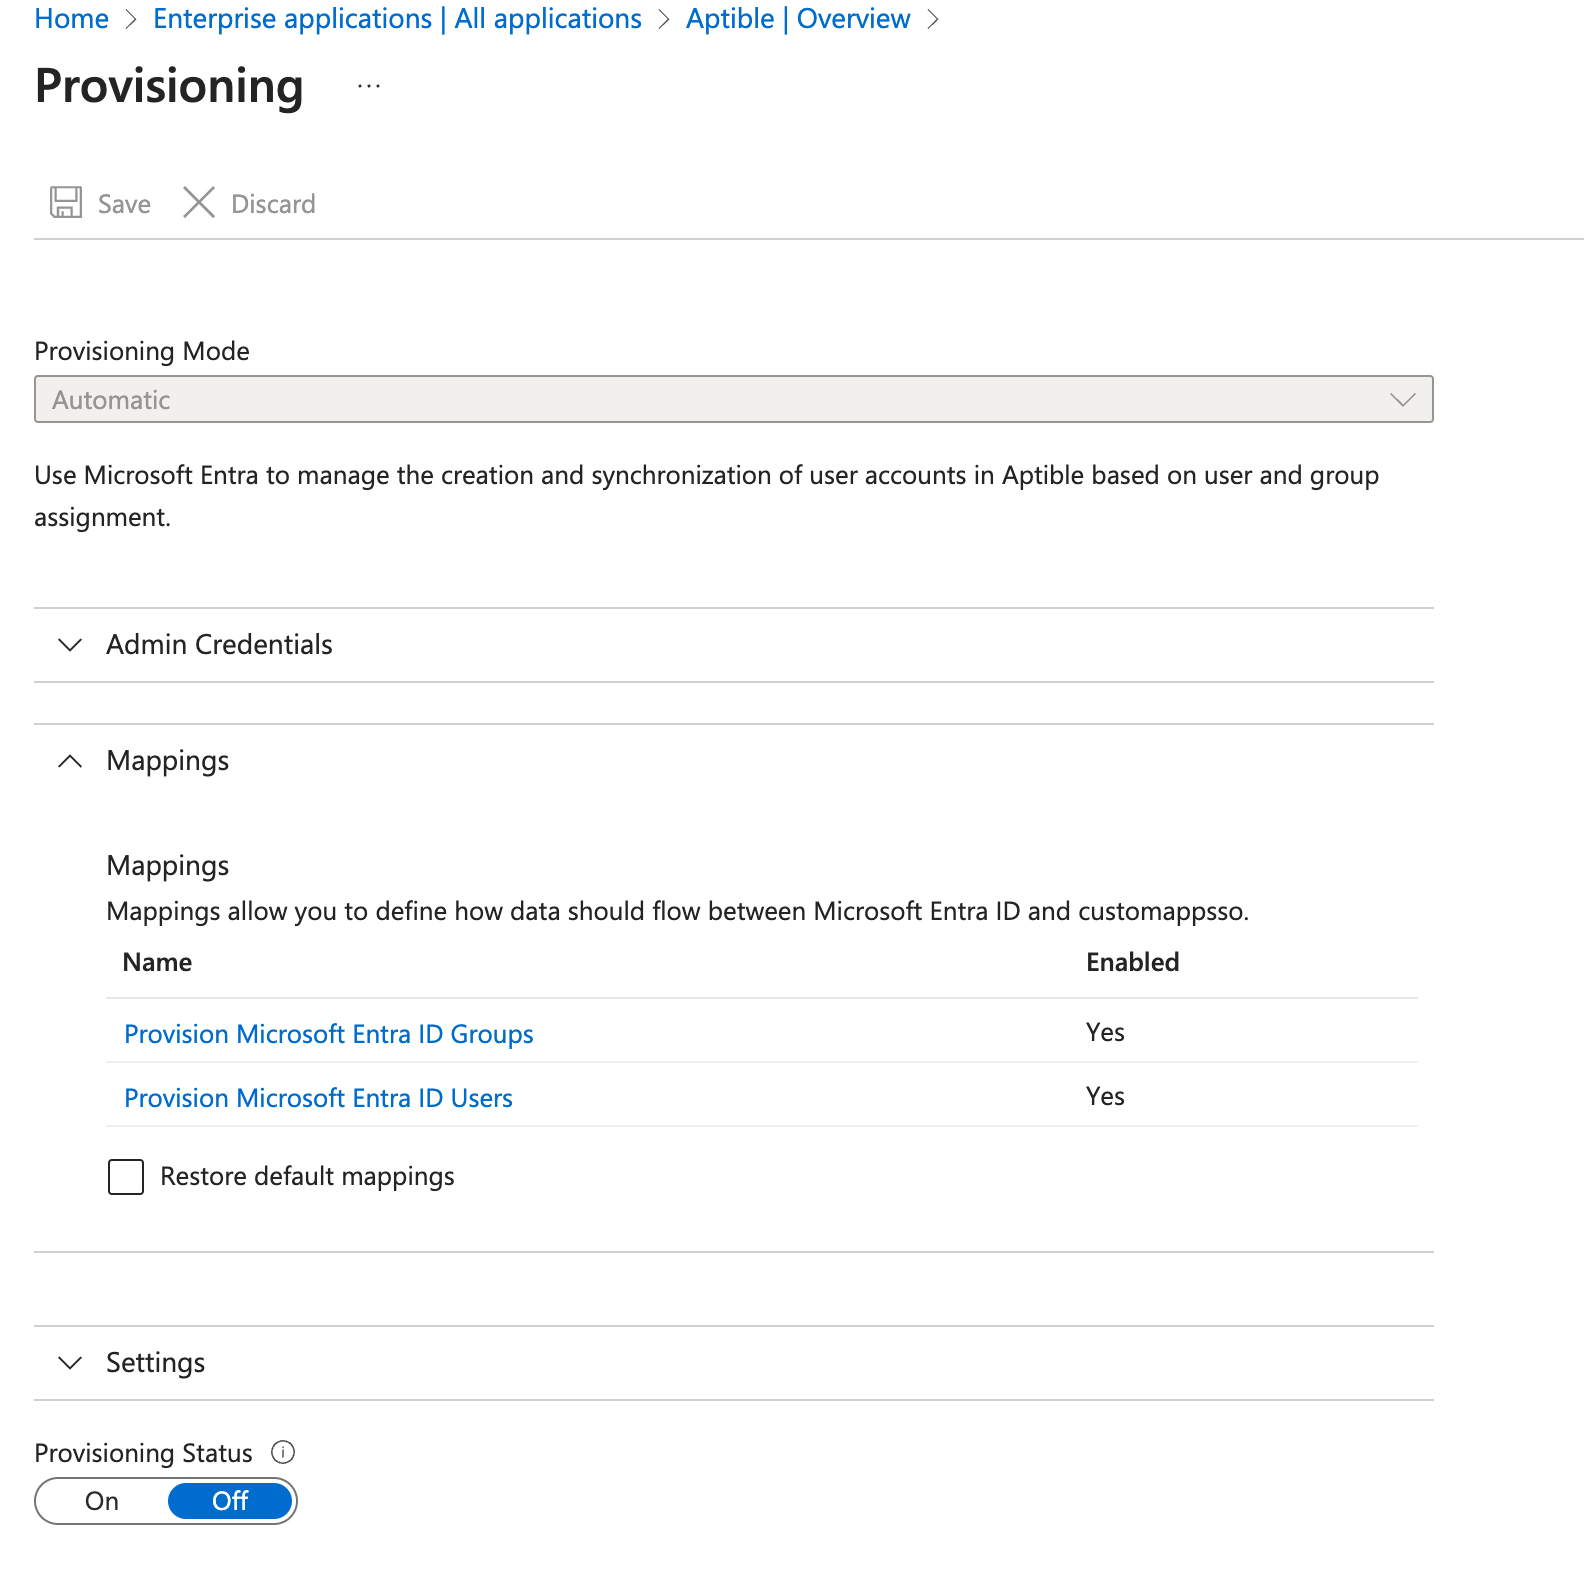
- Setup SCIM: In your custom application settings, go to the ‘Provisioning’ tab.
- Configure SCIM: Click on ‘Get started’ and select ‘Automatic’ for the Provisioning Mode.
- Enter SCIM Connection Details:
- Tenant URL: Enter
https://auth.aptible.com/scim_v2. - Secret Token: Paste the SCIM token you previously saved.

- Tenant URL: Enter
- Test Connection: Test the SCIM connection to verify that the SCIM endpoint is functional and that the token is correct.
- Save and Start Provisioning: Save the settings and turn on provisioning to start syncing users.
Step 3: Configure Attribute Mapping
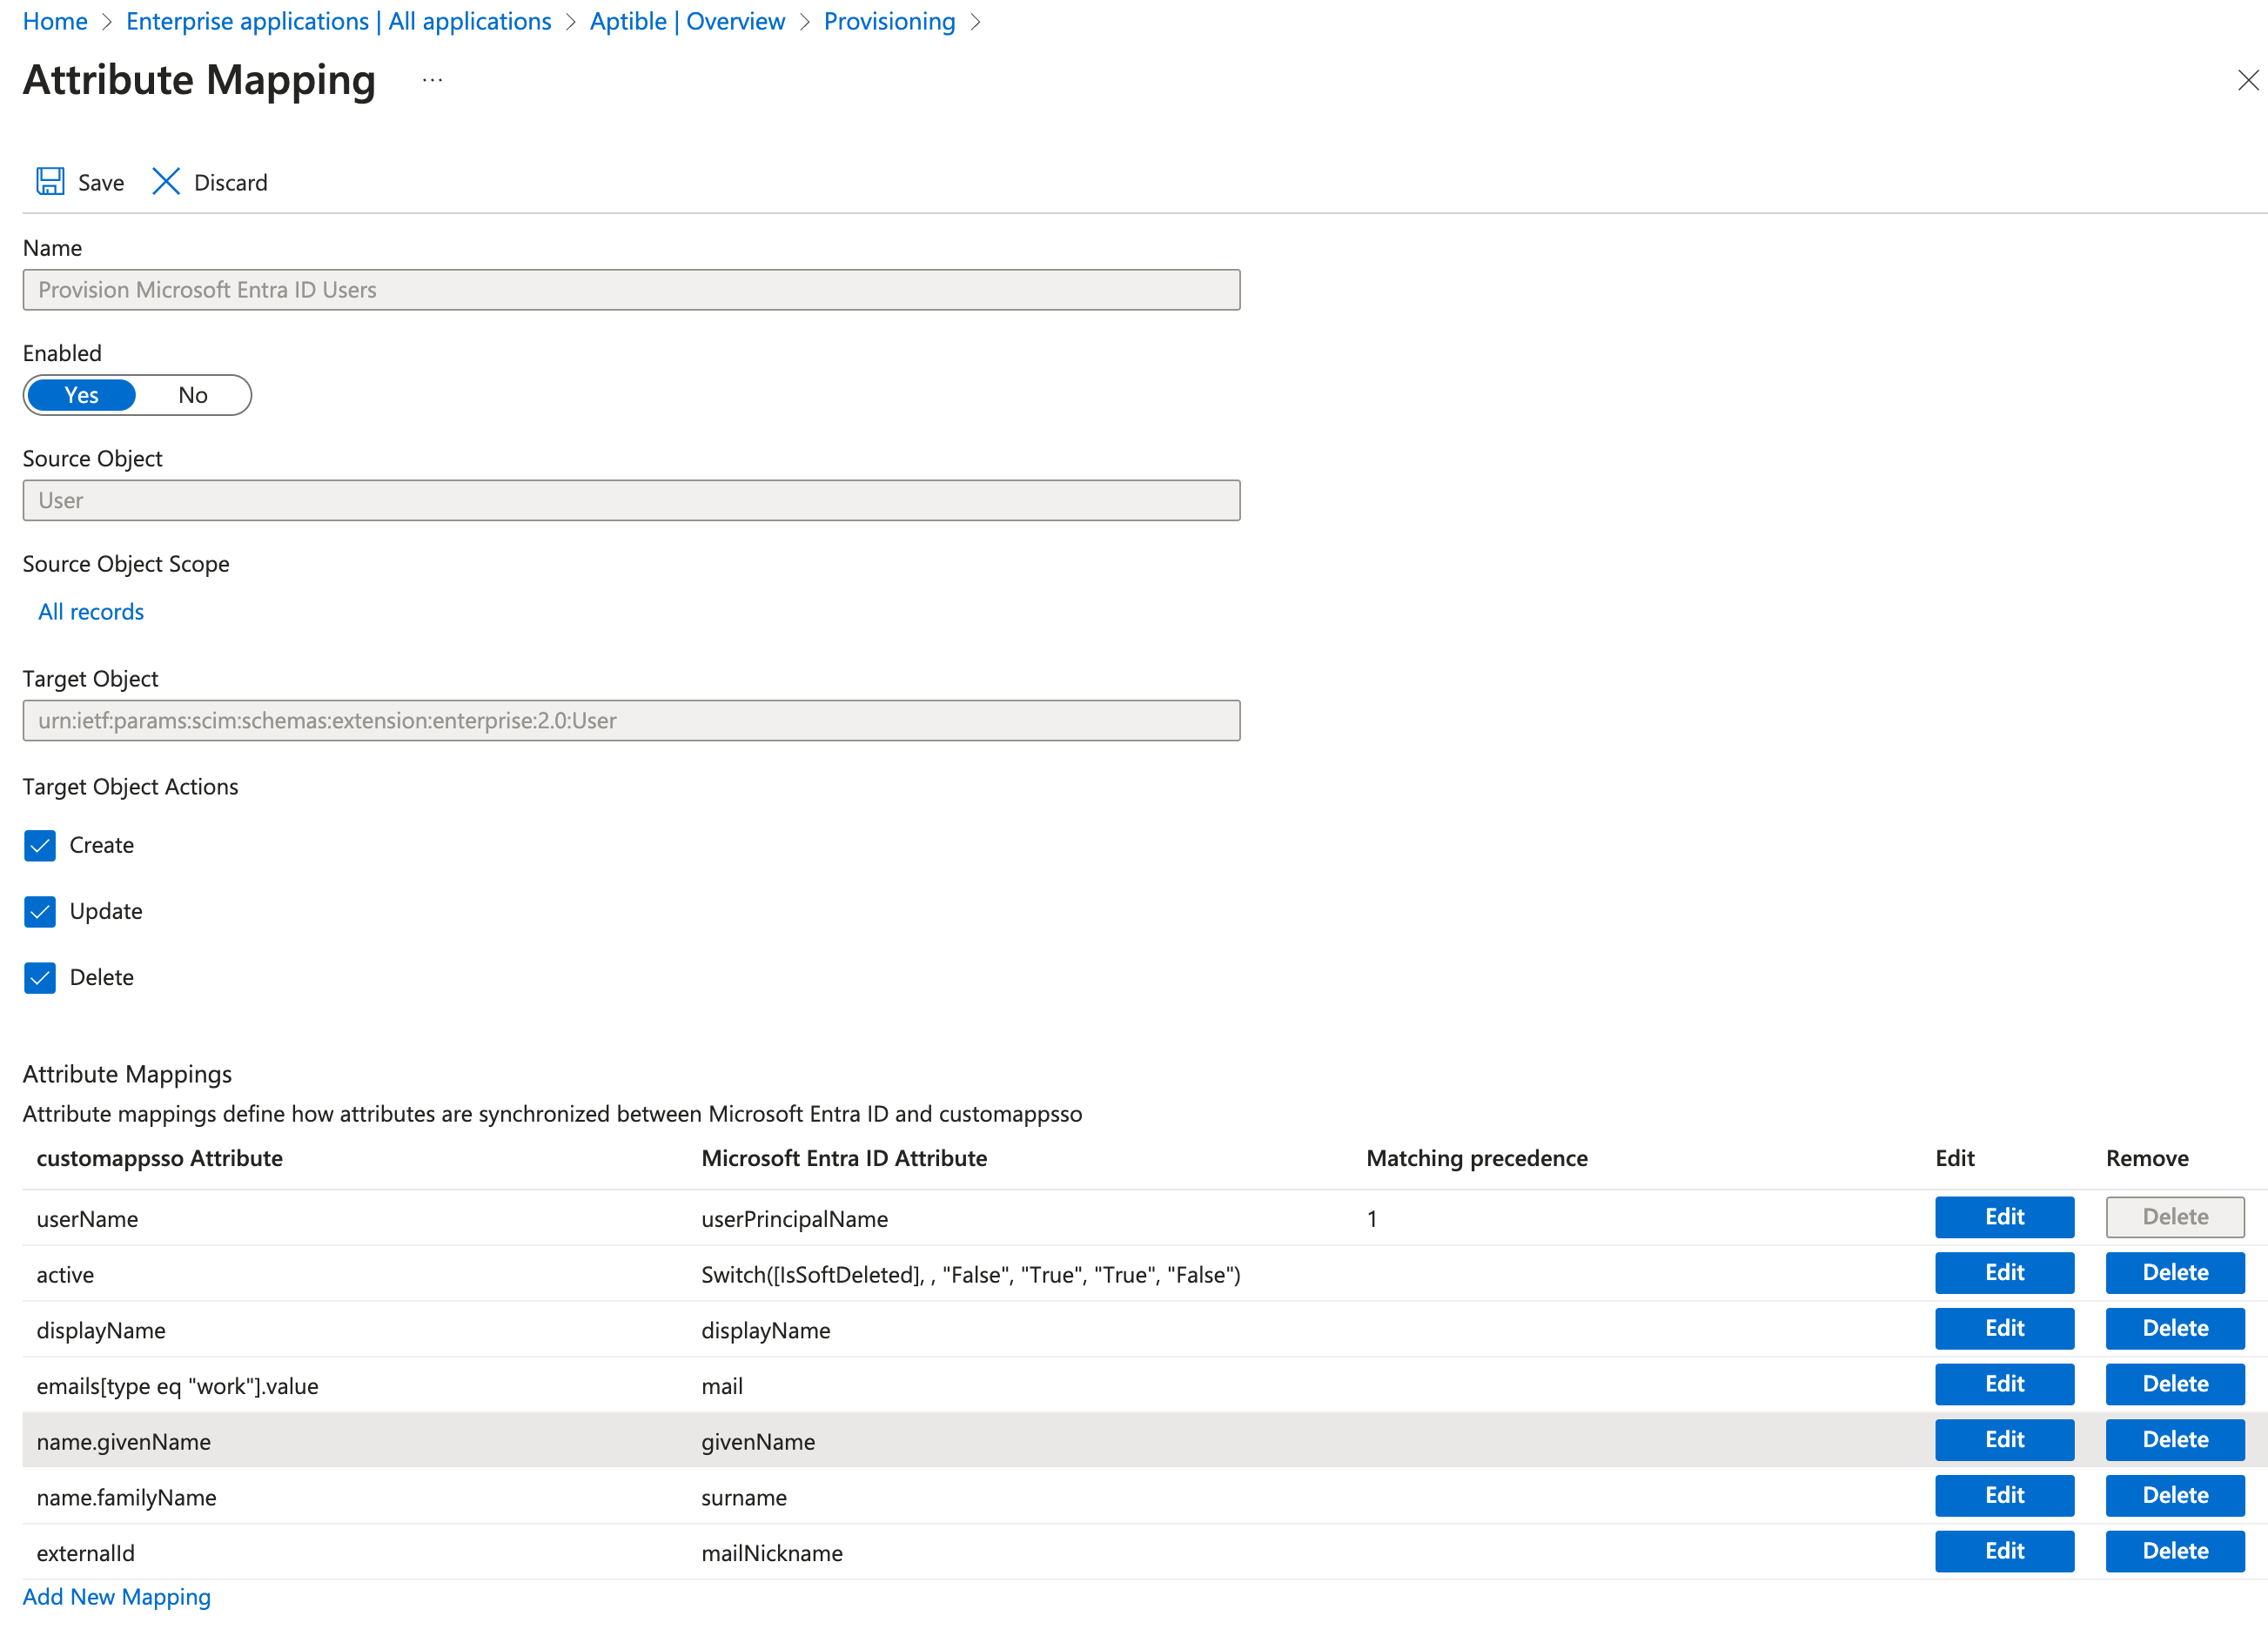
Customize the attributes that Entra Identity will send to Aptible through SCIM:- Adjust the Mapping: In the ‘Provisioning’ tab of your application, select ‘Provision Microsoft Entra ID Users’ to modify the attribute mappings.
- Edit Attribute Mapping: Ensure to align with what Aptible expects, focusing on core attributes like User Principal Name, Given Name, and Surname.
-
Include required attributes: Make sure to map essential attributes such as:
- userPrincipalName to userName
- givenName to firstName
- surname to familyName
- Switch([IsSoftDeleted], , “False”, “True”, “True”, “False”) to active
- mailNickname to externalId
Step 4: Test the SCIM Integration
- Test User Provisioning: Create a test user in Entra Identity and verify that the user is provisioned in Aptible.
- Test User De-provisioning: Deactivate or delete the test user in Entra Identity and confirm that the user is de-provisioned in Aptible.